Your Google Drive is the heart of your ability to teach in a smooth organized fashion. Access to the files in a quick efficient manner allows you to focus your efforts on pedagogy instead searching with frustration for that item you saved 4 months ago when you came across it.

As we start planning for the New Year, here are 12 strategies to get that Google Drive organized:

 1. Use a consistent naming system
Although Google has icons indicating the type of file you have created, keep the name short and meaningful with no extra information making the file clear to identify. e.g . Satellites Lesson and Satellites Picture. Remember that Google lists your files in alpha order so consistent naming protocols will help keep files together.

2. Organize into Folders and Sub-Folders then put in a Detailed Descriptor
Most people who have worked with Google Drive for a while know how to create folders and sub-folders, but did you know that you can add information and descriptions to your folders and sub-folders to help you identify what is in them? With thousands of files, this is a handy tool.

Click the Information icon, , on the folder bar and select “Details”. Then you can enter additional descriptors identifying the folder and its contents e.g. which lesson the folder information was used for.

3. Create a folder for each school year.
Teachers do not run on a calendar year, they run on a school year. You can go to previous years data as you create your lessons for the new year.

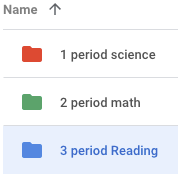
4. Color Code your folders
Adding color to your folders allows you to recognize your folders more quickly. Colors can be created to signify importance, type or class periods. e.g. class starters.
To change the color of the folder in Drive.

a. Right-click (or control-click) on the folder

b. Go to “Change Color”

c. Select the color from the palette

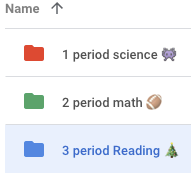
5.  Create a Numbering System
This can be helpful as numbers are listed at the top of a file system (above files and folders by alpha). If you created a folder system by class period, your classes would be listed at the top of the file system when you open the drive and the folders would be easily accessible.

6. Add Emoji and Special Characters
CopyPasteCharacter.com/emojis is a good site to grab some emojis and spice up your Google Drive naming so it is not so boring. A simple copy and rename/paste brings a little life to the drive.

7. Use Hashtags
Hashtags can be used for event tags such as #APtesting. It can also be handy for numbering your assignments. Adding the # symbol helps group the numbers in a unique way, so when you search, you don’t get everything that has the number one in it, just #001

8. Try Google Drive Workspaces
Take advantage of the new Google Drive Priority Page and custom Workspaces to better organize your Google Drive as your work. Look for “Priority” to appear above “My Drive.” You can make the Priority page your default home by going to your Google Drive settings.
Priority uses machine learning to try to predict what files you will need next and making those available at the top of the page. Below Priority, you will also see Workspaces. Workspaces allows you to create a collection of files in one location. Use workspaces to organize files without moving them. The Priority page also organizes files into workspaces. These let you gather a private set of working files for ongoing easy access. Adding files to a workspace doesn’t affect their storage location or permissions—it just aggregates files to help you find them faster. Most users only work with around 10–20 files at any given time. Workspaces help make sure you can get to those files more efficiently. To build your workspace, you can use Drive’s intelligent file suggestions or add files manually.

9. Add a single file to multiple folders
There are times when a file does not exactly fit a single folder and should go into multiple places. In other programs, you would make a copy of the file and place it into the 2nd location. With Google Drive, just right click the file and select the folder where you want the 2nd copy to go. This method does not take up additional space with a 2nd copy, it just provides a 2nd label for the same file in another location.

10. Use the Advanced Search to find anything in your Google Drive
You can do a simple search, or click the drop-down arrow from the search box for more advanced search options. You can filter by file type, owner, keywords, dates, and more!

11. Leave “Shared with me” folder alone
The “Shared with me” Folder in Google Drive is a list of files others have shared with you. You should never delete any files in this folder as it may impact your’s or someone else’s’  ability to access those folders. If you want to add those files to your own drive, you can do so by selecting the Drive icon when the file is open and selecting “Add to Drive”.

12. Add Stars to frequently used files
I was surprised how many people still do not know about this one. By clicking the star at the right of the file you are working on, the file will then be placed into the Starred folder which I use as a Frequently Used folder. My top 10 frequently used documents are kept there so I always have easy access to those files.

There are many more ideas for organizing your Google Drive that you can find with a web search. Special thanks goes out to Kasey Bell and her great blog “Shake Up Learning” for many of these suggestions.

Happy Holidays!