Downloading your data from your DCDS Account
There are two methods for getting a copy of the data in your school-issued Google account
Google Takeout Transfer
- This method allows you to transfer all of your email and Google Drive files to another account.
- This will only work if you have a Google account (@gmail.com) or an account from another Google Workspace domain, such as a university that uses Google Workspace.
Google Takeout Download
- You would use this method if you are not transferring your data into another Google account.
- You would use this method if you are trying to download more data than what is offered by the Transfer feature (Google Photos, Chrome data, Google Keep notes, etc)
How to use Google Takeout Transfer to migrate your Data to another Google Account
Make sure the destination account you’re transferring into is a Google Account account (@gmail.com)
If the destination account is your university account, this will work only if it is a Google Workspace account.
On your DCDS (@dcds.edu) Google Account visit The Google Takeout Transfer Tool by going to this link:
https://takeout.google.com/transfer and follow the instructions below:
When you visit, you will be prompted to enter in the email address of the destination account.
Put the email address of the destination account in here.
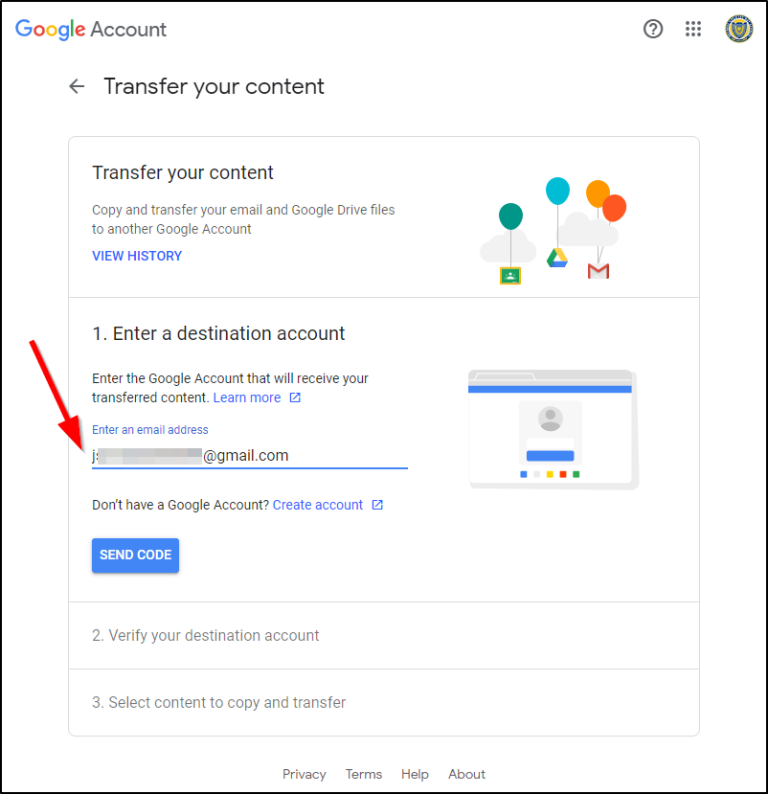
Once you click “Send Code” it will send a code to the destination gmail address you’ve typed in
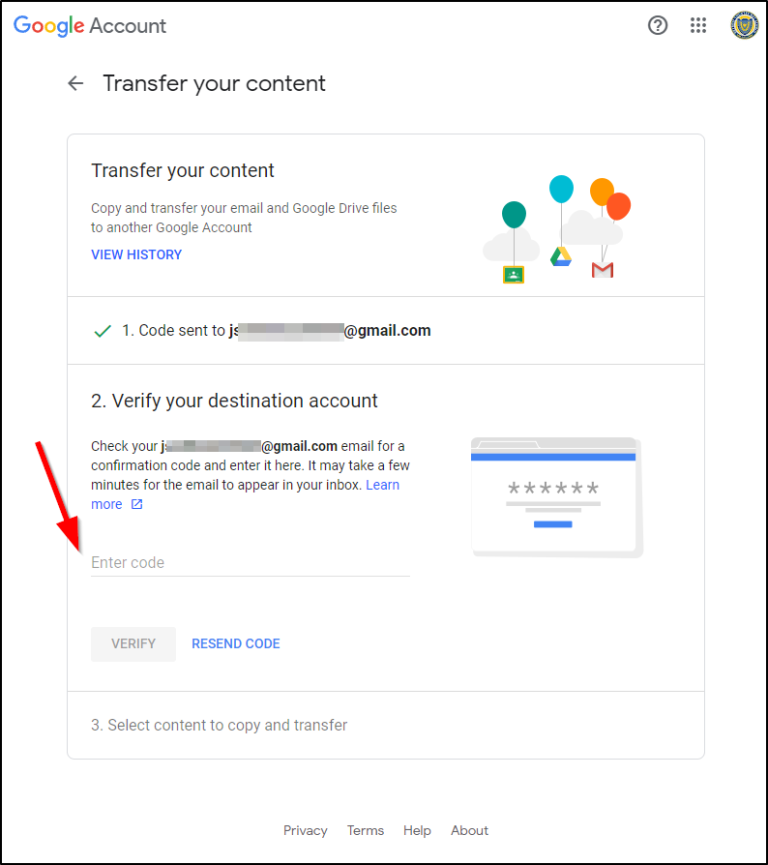
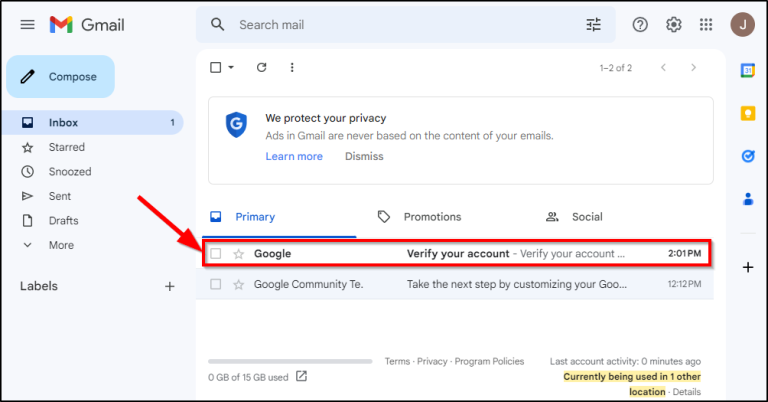
Now, go to your destination email account and check the email. You should see a new email from Google that asks you to “Verify your account”
Select the button that says “Get Confirmation code”
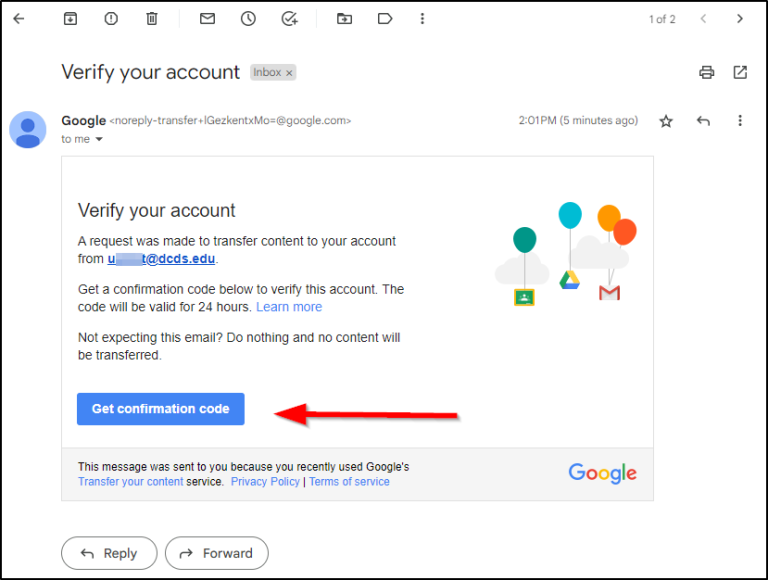
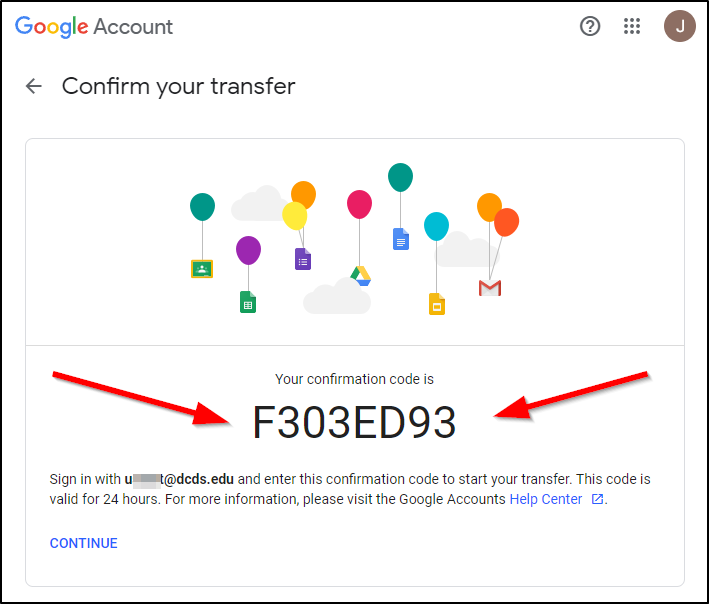
This may open up a new tab or page to bring you to the “Confirm your Transfer” page with the confirmation code listed here. This code is only valid for 24 hours before you have to restart the process, so from here you can click “continue” or just go back to your student account to enter in the code at the Google Takeout Transfer Tool page.
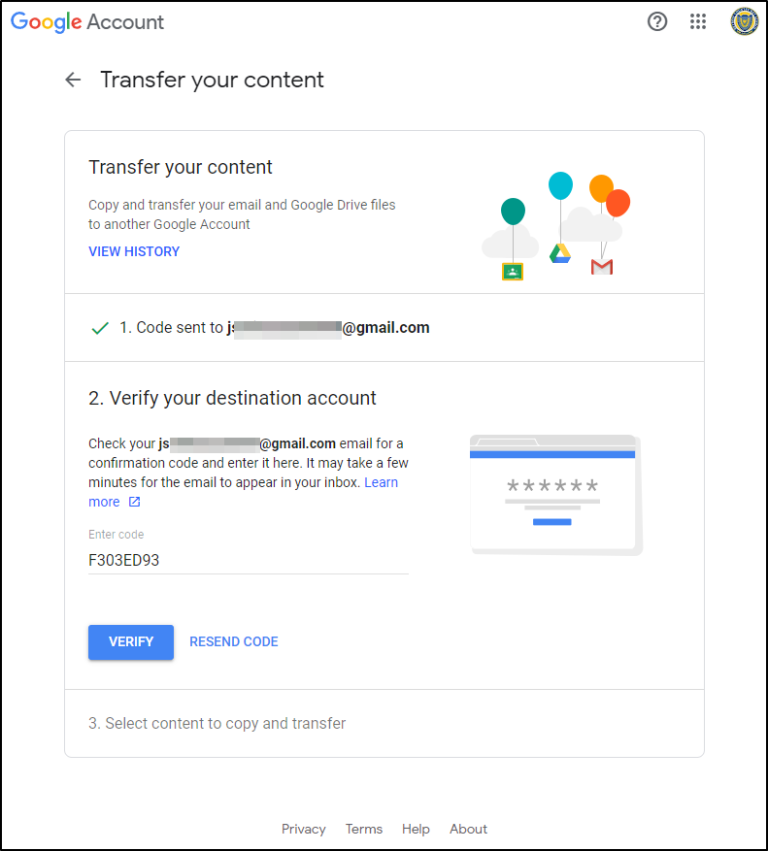
Now that you’re back at your Google Takeout Transfer tool, enter the code and click “Verify”
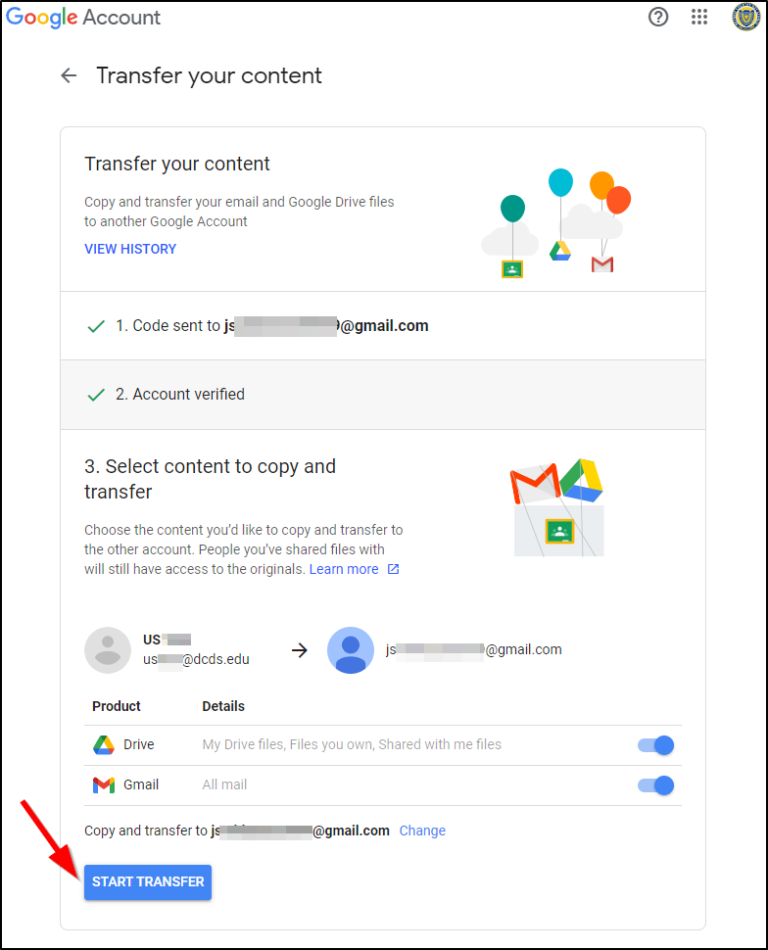
you can select the content to copy and transfer. Note, that this will not transfer your data from your student account and leave your student account empty; it is merely copying the data to the destination account. So if you mess something up, you can still redo it without any worries.
Now, click “Start Transfer”
Once you have received the confirmation email from Google that the data has been successfully transferred you can see the transferred content in the destination account. See our FAQs for more information on how to access your data.
How to use Google Takeout to Download your Data to your Computer
On your DCDS (@dcds.edu) Google Account, visit Google Takeout
Go to this link:: https://takeout.google.com/ and follow the instructions below:
You’ll notice a very long list of services available for you to download.
We recommend only downloading data from services that are important to you, as this will decrease the amount of time it takes to create the backup.
The ones we recommend keeping would be:
- Calendar
- Chrome
- Drive
- Photos (if you have uploaded anything there)
- Keep
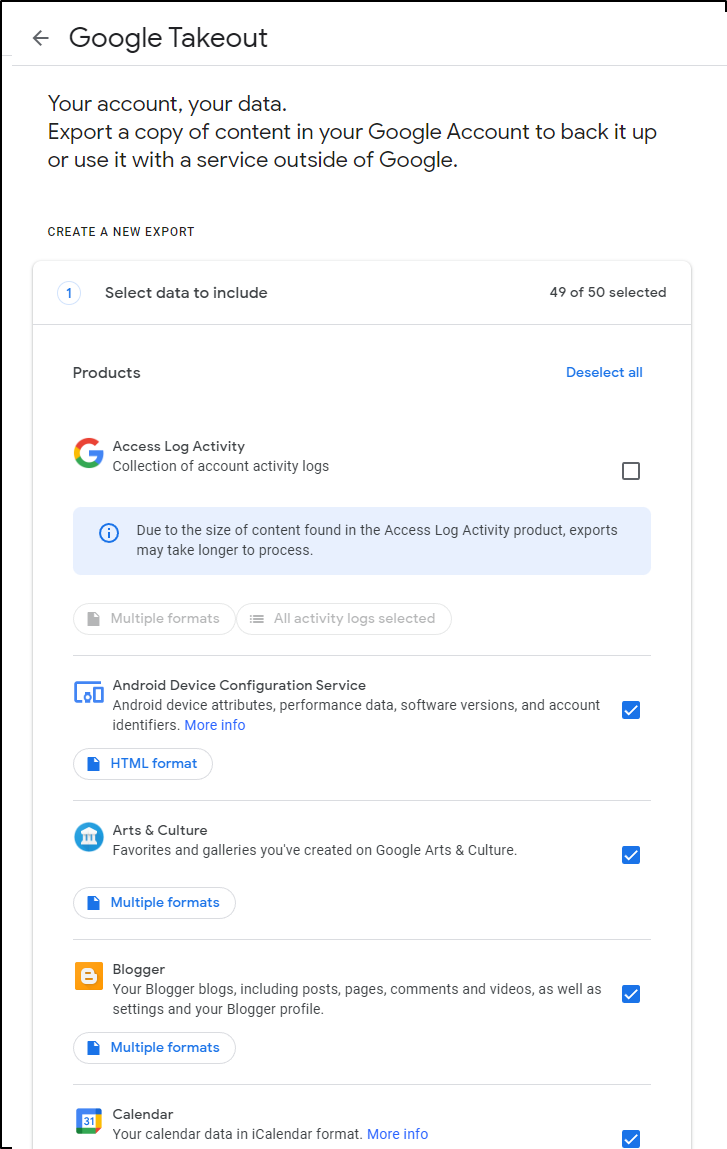
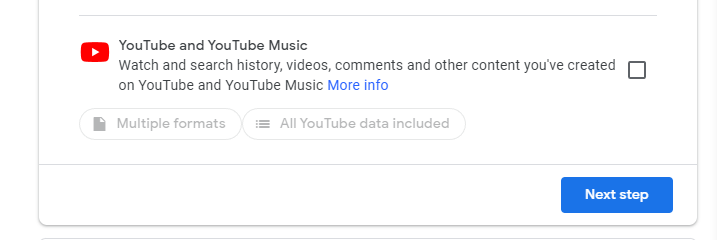
Once you’ve finished selecting all your services and the formats you want them in, click “next step”
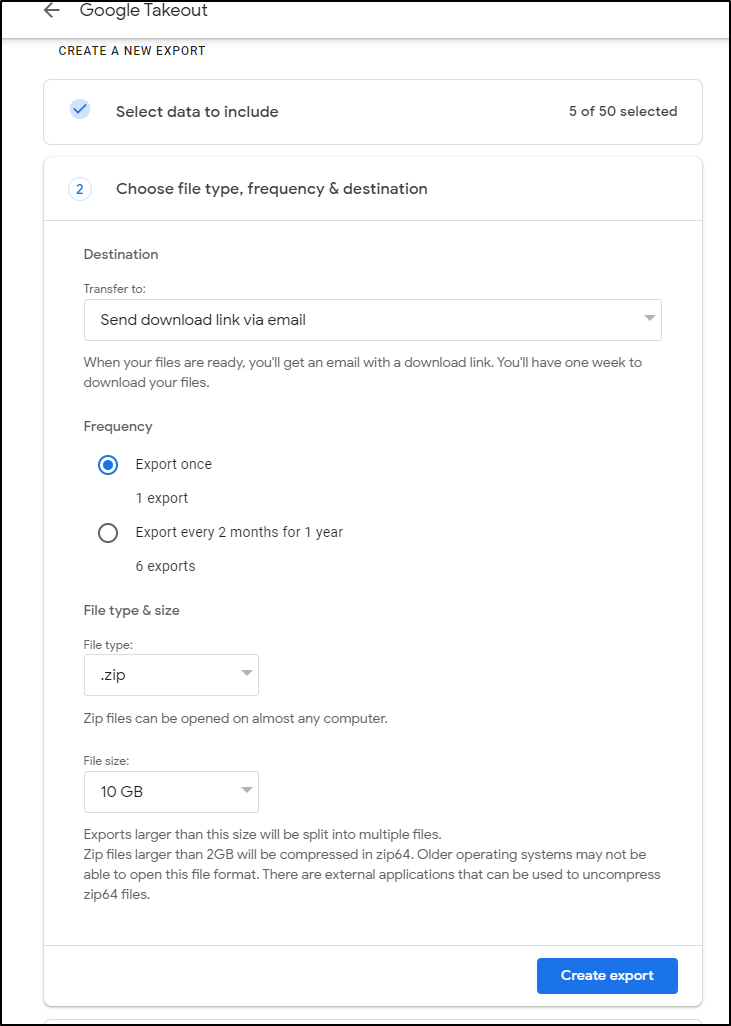
You will now be greeted with some options about how you will get your Google Takeout Archive.
We recommend the following options:
Transfer to: Send download link via email
Frequency: Export Once
File Type: .zip
File Size: 5GB or 10GB
Now select “Create Export”
You will now see your “Export Progress” page
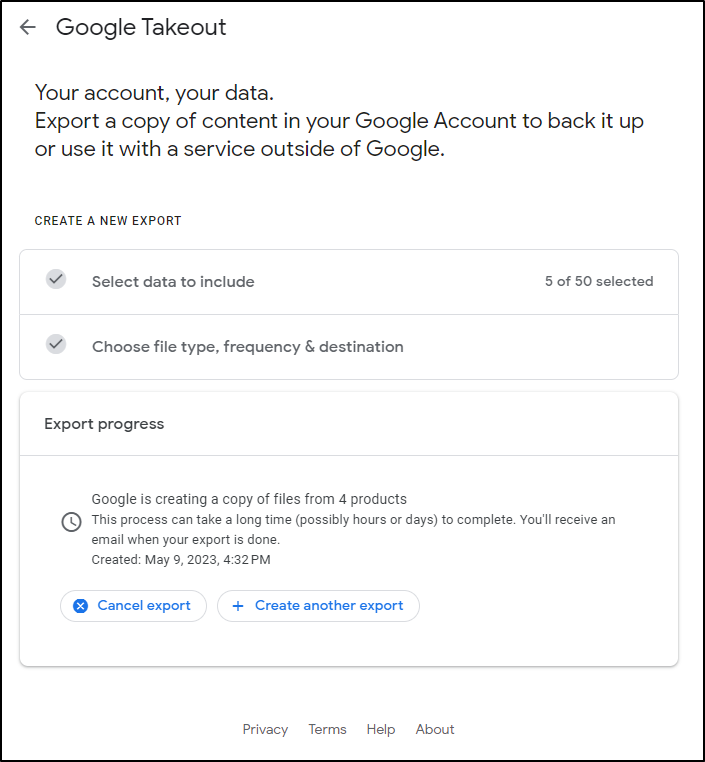
This part can take hours, or even days to finish, depending on the amount of data you’re trying to archive. From personal experience, less than 10GB takes under 10 hours. More than that might take days.
After waiting, you will eventually get an email that looks like this, sent to your student account.
The email itself will look like this
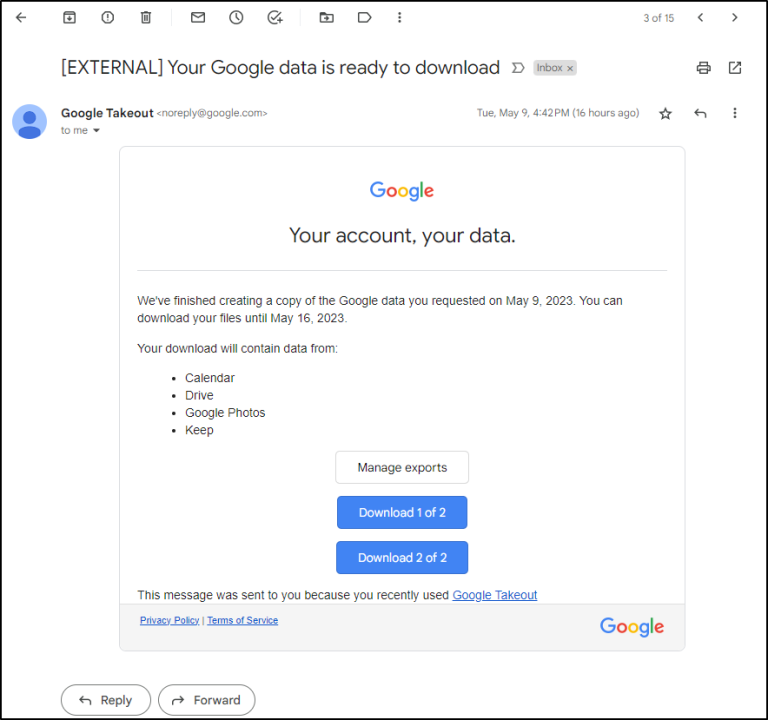
At this point, you can either download the archives using the links in the email or click on “Manage Exports” to be taken back to Google Takeout and download them directly
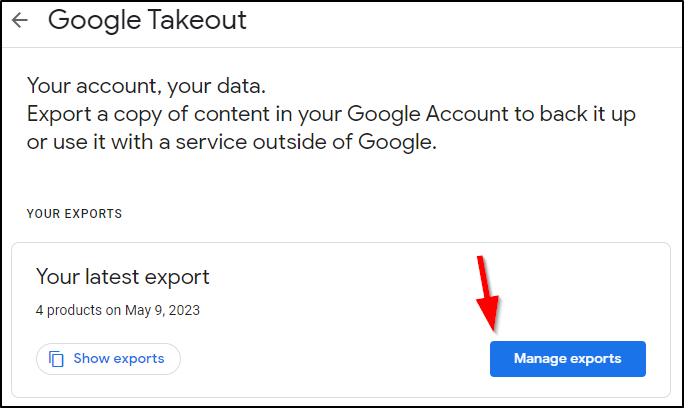
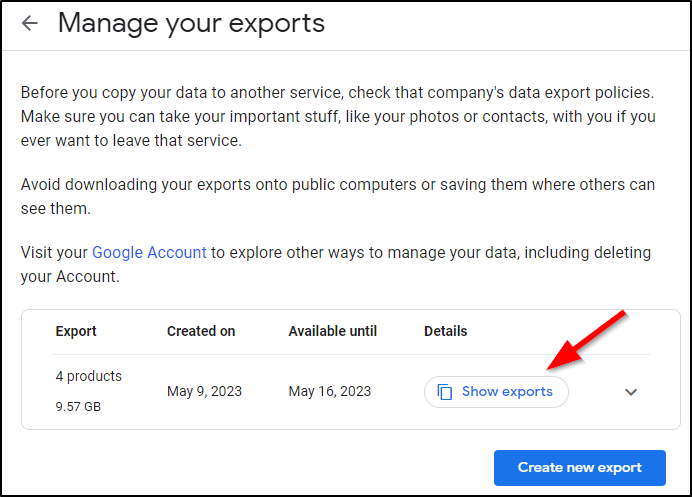
Note that there is an expiration date on when you can download this data. We see in the example here my export will no longer be downloadable after May 16 2023, at which point I would have to restart the Google Takeout process all over again. Be sure to download your data quickly so that you do not have to repeat the process!
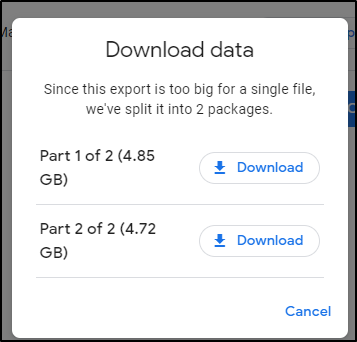
You will get a pop-up that shows you the different .ZIP files that your Google Takeout export has been separated into. The size of each .ZIP was determined by the size you set earlier. For our example earlier, I chose “5GB”
We highly recommend downloading each .ZIP of your archive individually and waiting until it has finished downloading before downloading the next one; do not attempt to download all of them at once, as this can slow the process down. Additionally, if you experience a network interruption, it will likely stop the download for all of them, or result in a partial download of data that has to be restarted.
The .zip files will have the name “takeout” + the date of the archive. Once you have downloaded all of the parts of your export you should be all set!

Frequently Asked Questions
All Google Doc files are converted to their compatible Microsoft Office versions of the files. Eg. Google Docs become Word files, Sheets become Excel files, etc.
As of May 2023, Google only offers 15GB of free Google Drive storage. If your student account exceeds this amount, you will get the message pictured below: “Destination account doesn’t have enough storage for this transfer”

What should you do in this situation? You have several options. You could use the Google Takeout Download method to download your data to your computer. You could delete data off of your Google Drive, or your Gmail. You could also purchase more cloud storage from Google, in which case you can click “upgrade storage.” This may be the easiest option for most people who exceed their free storage space.
Note: If you’re transferring into a university Google Workspace account, their Drive storage limits may be different.
You can check how much storage you have available by going to your Google Account Data and Privacy Page:
https://myaccount.google.com/data-and-privacy
From here, you can see how much storage your account is using in both Google Drive and in Gmail. Scroll down to “Apps and services” and you can select either “Drive” or “Gmail” From each of these, you can see how much data you’re using:
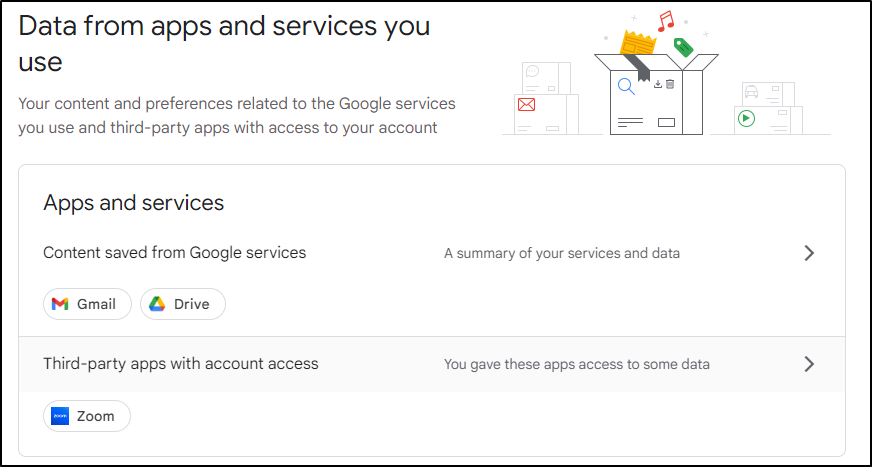
From here you’ll see a more detailed breakdown of what each of your Google Services is doing (chrome, calendar, etc) but keep in mind you can use the Google Takeout tool to download any of this data.
Now, you can go to drive.google.com to look at your Google Drive data
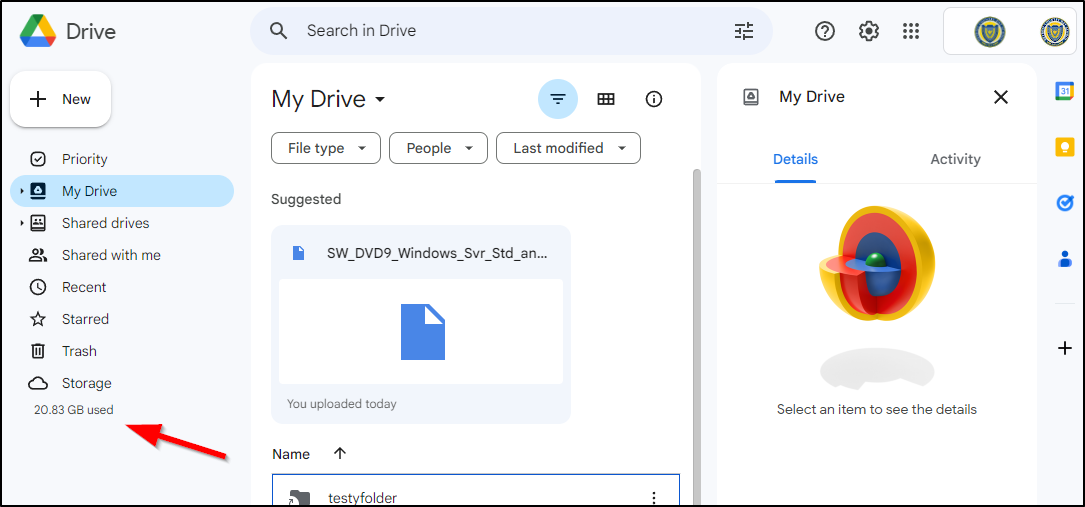
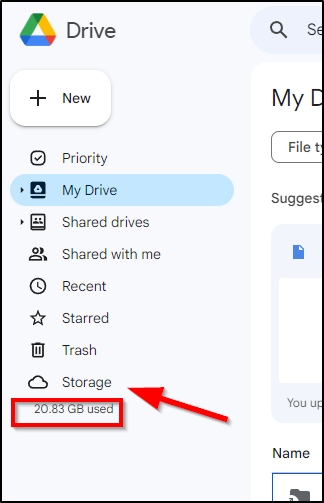
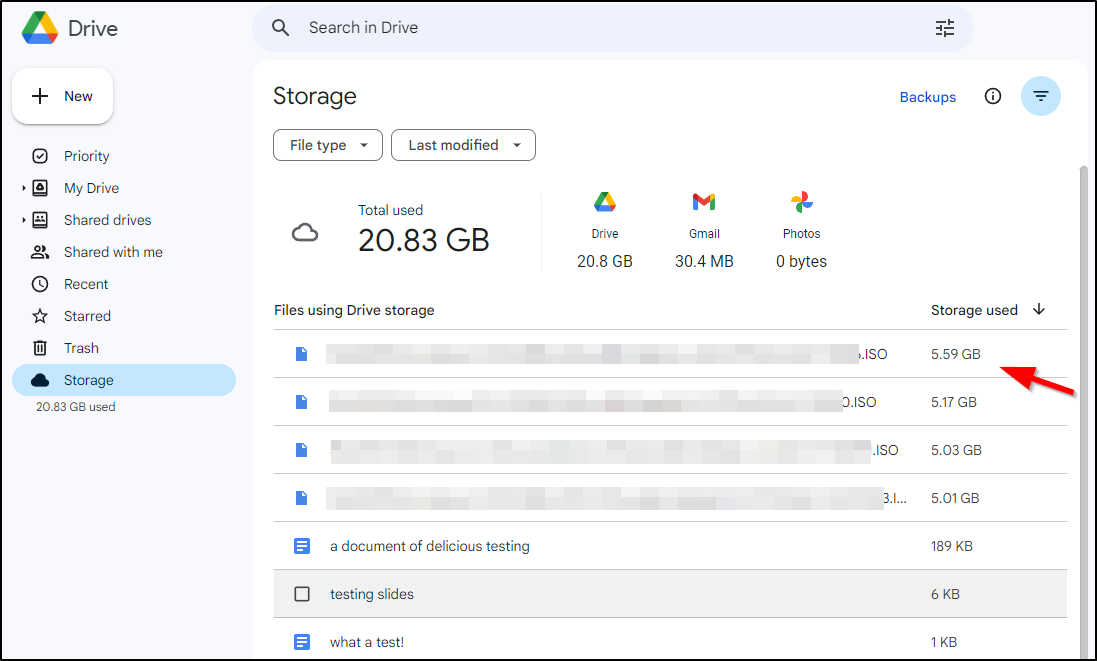
We can see here we’re using 20.83 GB of storage. Select “Storage” and you’ll get a breakdown of what’s being used in your Google Account.
Here is the breakdown of what’s taking up all the space. Removing these files will clear up the space issue and allow you to continue transferring everything you need.
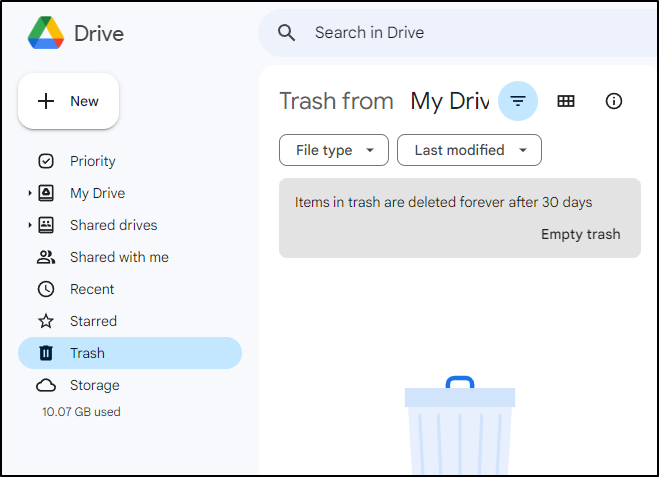
Don’t forget to empty your trash afterwards, otherwise it won’t actually remove the data!
Your email archive will exist in an .MBOX format, which can be understood by most mail applications: Thunderbird, Outlook or the MacOS Mail app. The User settings is contained inside of a .JSON file, although, you will probably not need the User Settings file. The important stuff, your email, is all inside the .MBOX file.
Please Note: There are a lot of tutorials on the internet that will purport to help you import an MBOX that require downloading “special tools” to perform this process. Most of these tools are malicious in nature. The easiest way to import this data into a readable format can be found here:
Using MacOS Mail app: https://www.emaildoctor.org/blog/import-export-mbox-mac-mail/
Using Thunderbird (on Windows): https://documentation.its.umich.edu/mbox-thunderbird
Using Outlook (On Windows):
Import the .MBOX into Thunderbird
Export as .PST
Import into Outlook
Download this PDF file for instructions on migrating your data out of NoodleTools
