Printing To School Printers
Printing through Google Chrome
If you have the Google Chrome Browser and are signed in to it then you will be able to print directly to select School Printers via the default Google Print Dialogue.
To begin printing, open the document, file, or webpage you would like to print. This could be a file in Google Drive, a PDF file from your PC, a webpage or email, etc. In this example I am using a Document in Google Drive.
1. Click the Print Icon in the top bar or just use the key command Ctrl-P (or Command-P if you are using a Mac)

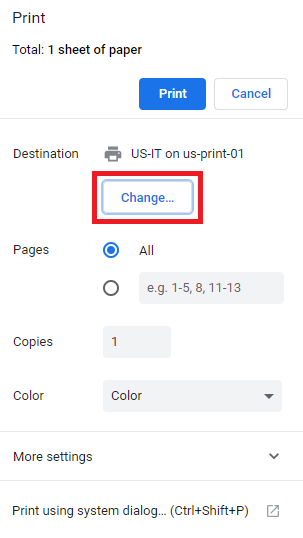
2. On the Print Dialogue box click on the ‘Change…’ button.
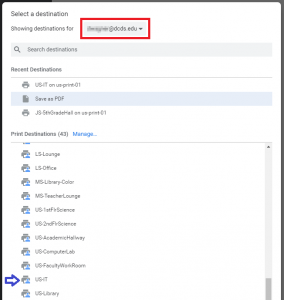
3. From this window you will now be able to select the printer that you would like to print to. Printers that have the little blue icon next to them are the School Printers shared via Google Cloud Print. If you do not see the correct printers, make sure that the account at the top of the page (highlighted in red) is your DCDS account.
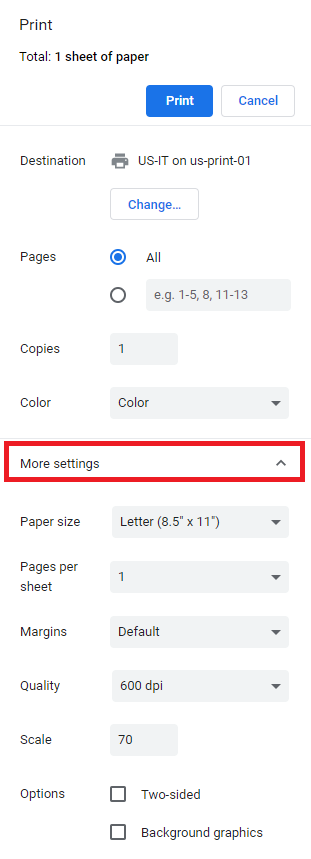
4. Now that you have the printer selected you can edit the settings of your print job. Click on ‘More settings’ for a full list of changes that can be made. Once you have set up the job the way you want it click ‘Print’ at the top.
NOTE: not all of our printers are color printers so if you are not able to change the print job to color you need to select a different printer.
Printing through PaperCut
If you don’t have the Google Chrome Browser installed on your computer then you will need to use our PaperCut service to print to Campus Printers.
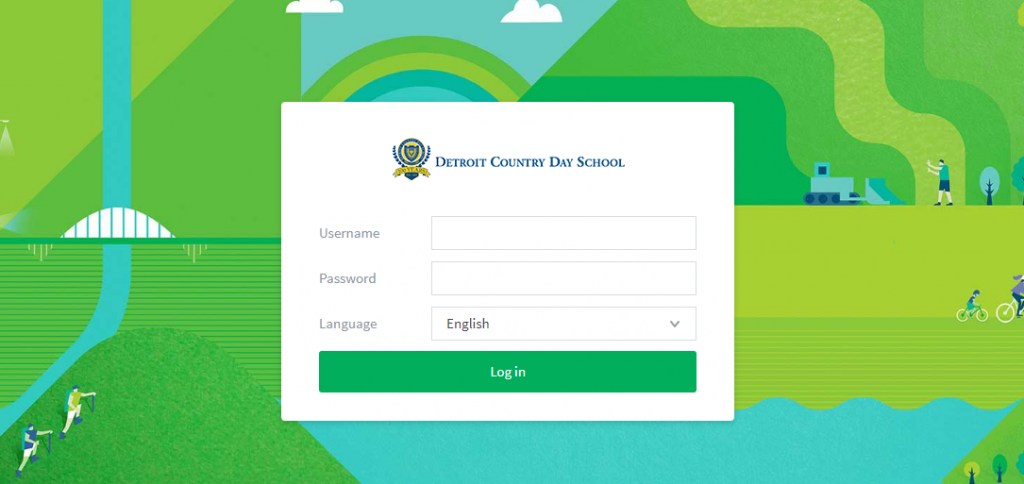
1. Go to printing.dcds.edu and log into the page with your DCDS credentials.
2. After logging in, click on ‘Submit A Job’

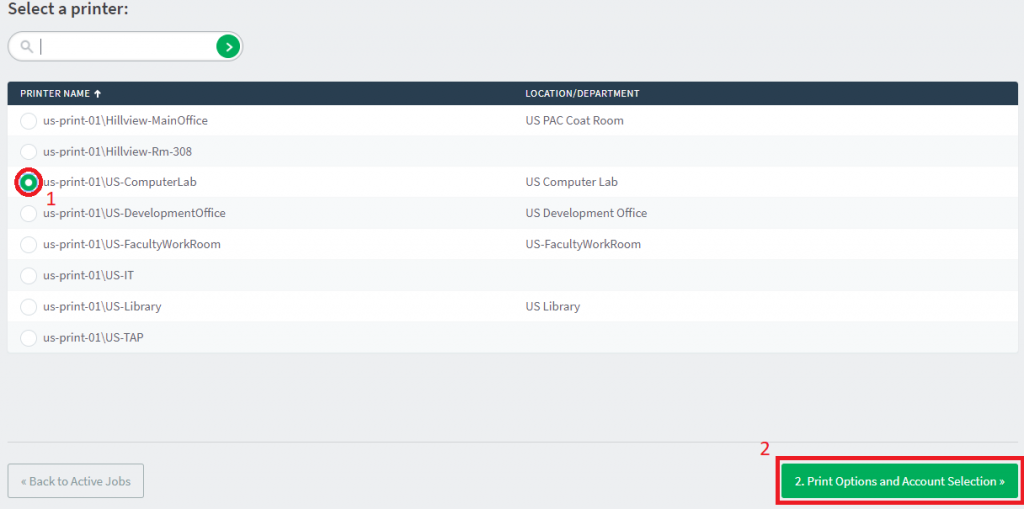
3. Select the printer that you would like to print to by ticking the box to the left of the printer and then clicking ‘Print Options and Account Selection’ in the bottom right.
4. The only print options that are changable via PaperCut is the number of copies. When finished, click ‘Upload Documents’

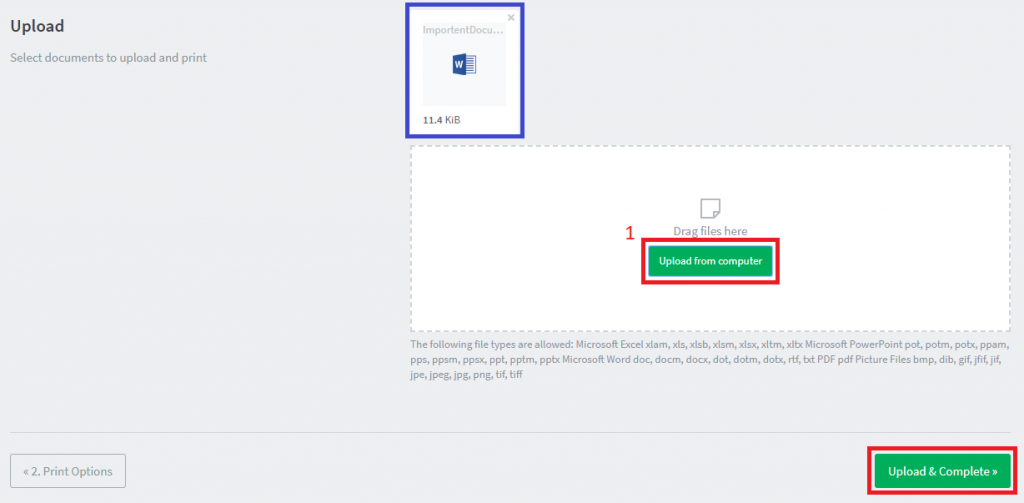
5. On this page first click ‘Upload from computer’ and then select the file that you wish to upload. When your file has uploaded it will appear at the top of the page (highlighted in blue below) Then select ‘Upload & Complete’
6. Now your document has been uploaded. You will be able to see the status of the print job on the right of the page. Once the status is ‘Printed’ Your document should be available for pickup at the printer you selected.

